
Whether or not you are attending school, this project is perfect for personalizing a generic notebook you may have lying around. The best part about this project is that it is quick, cheap, and easy to make and the end result is an adorable little notebook you can use to take notes in class or have around the home.

Today’s project is a composition notebook makeover. I personally prefer spiral notebooks when it comes to taking notes, but there is always that one class that requires you to bring a composition notebook. I had a few notebooks lying around with only a few pages used up so I thought that I would makeover and reuse them for this upcoming school year.
I will be showing you how to make two different types of decorated Notebooks.
Hope you enjoy and let's get started!

Here are some of the things you will be needing for the first D.I.Y:
- An old or new composition notebook
- Glue: Modpodge or tackyglue ( I used tacky glue)
- Some pieces of Scrap book paper with a design you like
- scissors
- cup
- paintbrush
- pencil/sharpie/pen/marker for decoration
- ruler
- tape: I used black plumber's tape
 |
| * In my picture there is too much glue in one spot. To get the best results try to keep the glue evenly spreaded out. Remember that you won’t need a huge amount of glue to get your paper to stay attatched. |
 |
| This is what it should look like flipped around. |
Step 3. Paint glue onto the backside of your notebook as you
did for cover: thin and evenly spread.
 |
Step 4. Wrap your remaining scrapbook paper around the
binding or your notebook, then smooth it onto the backside.

Step 5. Use another piece of scrap book paper to finish covering the backside or your notebook.
 |
| One piece of scrap book paper won’t be enough to cover your whole entire notebook so you can use another piece of the same design of a combination of another design. |
Step 6. Trim off any
excess paper that sticks out more than half an inch.
 |

Step 7. Open your notebook to the front page and cut the
scrap book paper according to the red dotted lines in the picture below.

Step 8. Fold in the
edges of your paper and paste into your note book like shown below:
Step 9. Take a Strip of Scrap book paper and flip it over so
that the white side is showing. Glue the paper onto your notebook. This is up
to you and how you want your notebook to look. I decided to paste on my strip
of paper diagonally.
 |
Step 10. Trim your strip of paper so that if fits your notebook or tuck it in and
glue it for a cleaner look.
 |
Step 11. Take your ruler and pencil and draw a straight line
down your strip of paper. Afterwards, go over with a permanent marker or pen.
This is where you will be writing your notebook subject, so make sure to leave some space
for words.
 |
| I couldn't find a ruler so I used the straight edge of a paint stick. |
Step 12. Add on any extra embellishments or decorations if you want to. I decided to just keep it simple and clean looking because it was easier and in my opinion, looked nicer as it was.
 |
| Step13. Take your tape and stick it where the binding of the composition notebook would originally be. |
 |
Step 14. Trim off the excess edges of tape and now you have a functional notebook spine.
 |

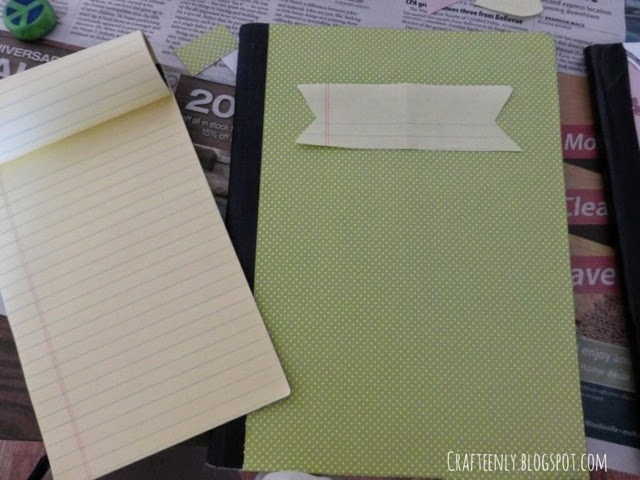
This next Note book D.I.Y is extremely similar to the first one. Just follow along the same steps of pasting your sheet of scrapbook paper onto your notebook.
For the cover, I took some yellow note taking paper and cut it out into the shape of a decorative flag/ribbon then pasted it onto the cover.
The next step is to outline with a sharpie and add any extra embellishments of your choice.
 |
Hope you guys try this project of personalizing your notebooks and enjoy the last days of summer while you can!
~Angela
No comments:
Post a Comment